What's in this review
- Before you start: goals, schedule, and kitchen basics
- Step 1: Set your goals and pick your meal-prep style
- Step 2: Plan a balanced weekly menu
- Step 3: Build the grocery list and shop efficiently
- Step 4: Pick the right containers and food-safety basics
- Step 5: Batch-cook proteins, grains, and vegetables in one session
- Step 6: Portion and store for grab-and-go
- Step 7: Reheat safely and keep variety so you don’t burn out
- A worked example: an illustrative week from plan to plate
- Common meal-prep mistakes
- Troubleshooting and edge cases
- Your meal-prep checklist
- The bottom line
Short answer: Meal prep for the week runs in seven steps: set a goal and style, plan a balanced menu, shop from the plan, sort containers and food safety, batch cook, portion into containers, then reheat and rotate for variety. Plan storage around a commonly cited three to four day fridge window and freeze anything beyond it. Start small, often just a few lunches, and build in variety so you do not burn out.
The hardest part of eating well is almost never knowing what a good meal looks like. It is the six o’clock moment when you are tired, hungry, and staring into a fridge with no plan, because that is the moment a plan quietly loses to whatever is fastest. Meal prep is the fix that most reliably works, not because it is clever, but because it moves the deciding and the cooking to a calmer time and leaves your busy self with nothing to do but eat. Done well, a couple of hours once or twice a week hands you a stretch of meals that are already planned, already balanced, and already portioned, so the tired version of you never has to negotiate.
This evidence review is a step-by-step walkthrough for meal prepping a week of food, from setting a goal through reheating the last container safely. It covers what to sort out before you start, the seven steps in order, a worked example that runs one illustrative week from plan to plate, the mistakes that quietly derail a prep habit, and the edge cases worth knowing. Because a balanced prepped meal is still just a balanced meal, it leans on our walkthrough on building a balanced plate, our macros walkthrough, our calorie needs evidence review, and our protein evidence review. Everything here is general information, not medical or dietary advice, and every time, portion, and food-safety figure is a commonly cited illustrative guideline rather than a personal prescription. Try your own numbers in the companion below as you read.
Key takeaways
- Meal prep works by moving the planning and cooking to a calm time, so your busy self only has to reheat and eat, which is why it beats willpower at the tired hour.
- The seven steps run in order: set a goal and style, plan a balanced menu, shop, sort containers and food safety, batch-cook, portion, then reheat and rotate for variety.
- Plan storage around a commonly cited three to four day fridge window and freeze anything beyond it, rather than cooking seven days of one meal you will get sick of.
- The two habits that keep prep alive are starting small, often just a few lunches, and building in variety so you do not burn out on the same container.
- This is general educational information, and every time and food-safety figure here is a commonly cited illustrative guideline, so confirm anything specific to your health or diet with a doctor or registered dietitian.
Before you start: goals, schedule, and kitchen basics
Meal prep needs almost no special equipment and only a little planning the first few times, after which it turns into a comfortable routine. Before your first session, it helps to have three things loosely settled, none of which requires precision.
- Your goal. Whether you are prepping mainly to save time, to eat more balanced meals, to save money, or some mix of all three shapes almost every later choice, from the menu to the containers. Decide roughly what you most want out of it, because a prep built to save time looks different from one built to hit a nutrition goal.
- Your real schedule. Look honestly at the week ahead and count the meals you actually struggle with, the rushed weekday lunches, the late-night dinners, the skipped breakfasts. Prep those, not an imaginary perfect week. A prep aimed at your true pain points gets eaten, and one aimed at meals you were already handling fine just fills the fridge.
- Your kitchen basics. You need very little: a few storage containers, one or two sheet pans or pots, a knife and cutting board, and some fridge and freezer space. A larger pot, a sheet pan, and a set of stackable containers cover most prep. If space or gear is tight, that simply nudges you toward simpler styles and smaller batches, which the steps below account for.
Difficulty here is genuinely low, and the time cost is front-loaded: you spend a focused block once so that several later meals cost you nothing. The one thing worth being honest about is how much variety you need and how much you will realistically eat, because the fastest way to waste a prep session is to cook more than you want to eat before it needs to be thrown out. Everything below is a general educational framework, and none of it substitutes for guidance from a registered dietitian or doctor, particularly if you manage a health condition, take medication, are pregnant, or have any history of disordered eating.
Step 1: Set your goals and pick your meal-prep style
Begin by naming what you want from meal prep and choosing the style that fits it, because the style you pick changes how you shop, cook, and store for the rest of the week. There is no single correct method, only the one that matches your goal, your schedule, and your kitchen, so this first decision saves you from fighting a system that was never built for your situation.
Three styles cover most of what people actually do. Batch cooking means making large quantities of a few dishes, a big pot of chili, a tray of chicken, a pot of rice, then eating from them across several days, which is efficient and simple but can get repetitive. Portion or full-meal prep means assembling complete single-serving meals into individual containers, so each one is a grab-and-go plate, which is the most convenient later but takes the most container space and planning up front. Ingredient prep means washing, chopping, and partly cooking components, roasted vegetables, cooked grains, a protein, sauces, so you assemble fresh meals quickly during the week, which keeps food tasting fresh and flexible but leaves a little assembly for your busy self.
Match the style to your goal. If your main aim is saving time on weekday lunches, full-meal portioning wins. If you cook dinner but want the pieces ready, ingredient prep fits. If you are feeding a household or a budget, batch cooking usually stretches furthest. Many people blend them, batch-cooking a protein and a grain while portioning a couple of full lunches, and that mix is often the most sustainable.
Illustrative prep time by meal-prep style
A rough sense of how a single prep session's active time tends to compare across styles for several days of one meal. These are general illustrative ranges, not measured figures, and your real time depends on your menu and kitchen.
Bars scale to the most time-intensive style at 100 percent. Times are commonly cited illustrative ranges; ingredient prep trades less up-front time for a little assembly later.
Watch out for choosing a style by ambition rather than by honesty. The most elaborate full-meal system fails if you do not have the containers or the fridge space for it, and the leanest ingredient prep frustrates you if what you actually wanted was a grab-and-go lunch. Pick for the life you have, and remember this is a general framework you can adjust, not a rule.
Step 2: Plan a balanced weekly menu
With a style chosen, plan the actual menu, and plan it around balance rather than around whatever recipe caught your eye, because a prepped meal is only as good as what goes into it. This is the step that decides whether your week of food is nourishing or just convenient, so it is worth a few minutes of real thought before any shopping happens.
Build each meal on the same simple shape our balanced plate walkthrough lays out: roughly half the plate vegetables and fruit, about a quarter a quality protein, about a quarter a whole-grain or starchy carbohydrate, plus a little healthy fat. Meal prep makes this shape easier, not harder, because you are choosing components in advance and can deliberately include vegetables and protein rather than defaulting to whatever is fastest at dinner. Pick a protein or two, a grain or two, and a generous spread of vegetables, then imagine them combining into the meals you need.
A balanced meal-prep plate by proportion
One illustrative way to fill a single prepped container using the commonly cited plate shape. These are general guidelines meant to be flexible, not exact measurements for any one meal.
Segments are the commonly cited plate proportions and sum to 100 percent, with a little healthy fat folded through rather than given its own zone. General illustrative guideline, not a measurement.
A practical planning trick is to design for mix-and-match rather than for fixed recipes. If you cook a versatile protein, a neutral grain, and a few different vegetables, you can combine them into several distinct meals with different sauces, which builds variety in without multiplying the cooking. Decide how many meals you need first, using the companion below to turn meals per day and days into a total, then plan components to cover that count.
Watch out for planning meals you like the idea of but will not actually eat, and for menus with no vegetables because they are the fussiest part to prep. If half your plate is meant to be produce and your plan has almost none, the balance is lost before you shop. Keep the menu realistic and vegetable-forward, and treat these proportions as a flexible general guideline rather than a rule.
Step 3: Build the grocery list and shop efficiently
Turn the menu into a grocery list, because a list built straight from your planned meals is what keeps a prep session from stalling halfway through for a missing ingredient, and what stops the over-buying that quietly wastes both food and money. This step is short but it is where a good plan either holds together or falls apart.
Go through each planned meal and write down every component it needs, then group the list by store section, produce, proteins, grains and pantry, dairy, frozen, so you shop in one efficient loop rather than crisscrossing the store. Check what you already have before you leave, since half-used bags of rice and freezer proteins often cover more of the list than you expect. Scaling matters here: multiply each ingredient by the number of servings you are prepping, which the companion below estimates from your meals, days, and servings, so you buy enough without buying far too much.
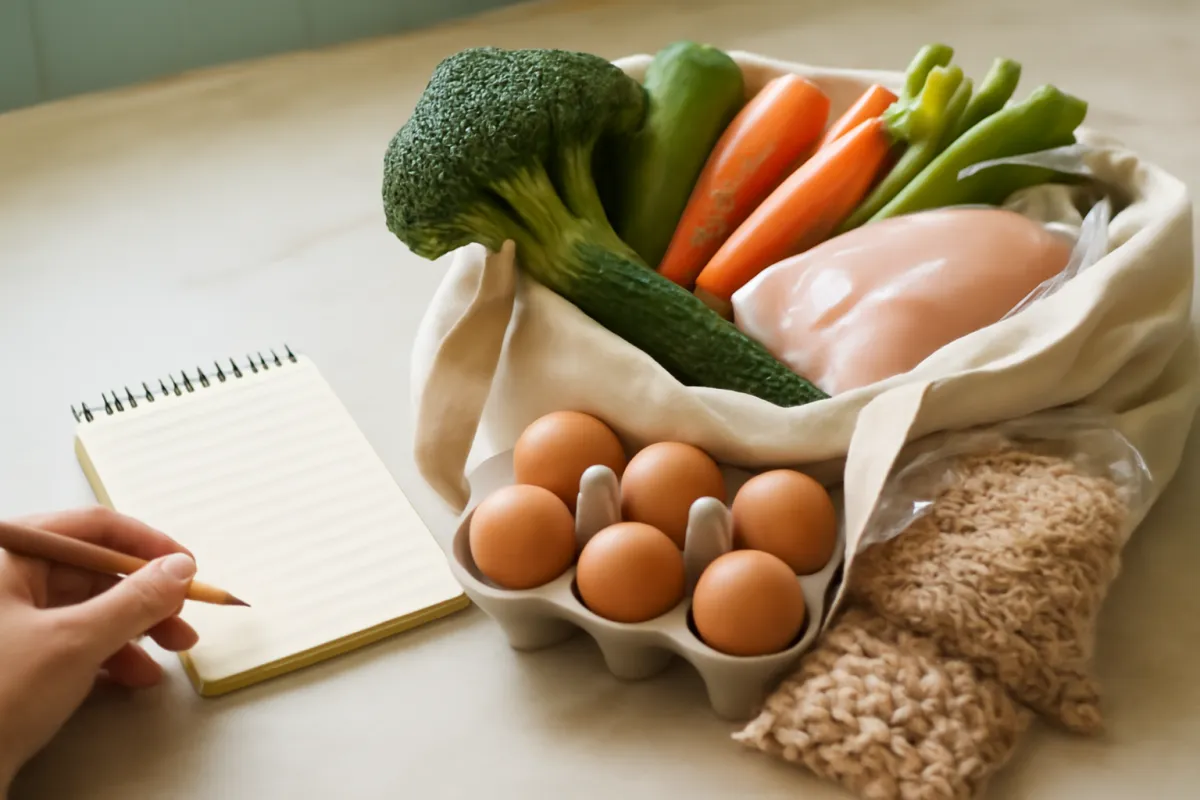
Shopping efficiently also has a budget angle worth using. Inexpensive staples that prep and store well, such as beans, lentils, eggs, whole grains, frozen vegetables, canned fish, and cheaper cuts of protein, stretch a grocery budget furthest, and planning around what is on sale or in season can lower the cost of a week of meals meaningfully. Frozen and canned vegetables count fully toward the vegetable half, keep for a long time, and cut both cost and waste, so leaning on them is a feature, not a compromise. Any cost figures here are illustrative and vary widely by region and season.
Watch out for shopping while hungry and for buying perishable ingredients faster than you will use them, both of which lead to the spoiled produce that turns a money-saving habit into a money-losing one. Buy to your list and your real serving count, lean on staples and frozen options, and treat the plan as the thing that protects your budget.
Step 4: Pick the right containers and food-safety basics
Before you cook, sort out where the food will live and how to keep it safe, because the best-cooked week of meals still fails if it spoils early or will not fit in your fridge. Containers and food safety are the unglamorous half of meal prep, and they are exactly the half that beginners tend to skip.
Choose containers that are airtight, stackable, and sized to your meals, since airtight lids slow spoilage and drying out, stacking saves the fridge space that limits how much you can prep, and single-serving sizes make portioning and grab-and-go effortless. Both glass and quality plastic work; glass tends to last longer, resist staining, and reheat cleanly, while plastic is lighter and cheaper, so the right pick is a practical one for your budget and space. Having enough matched containers is often the real bottleneck that decides how many meals you can realistically prep.
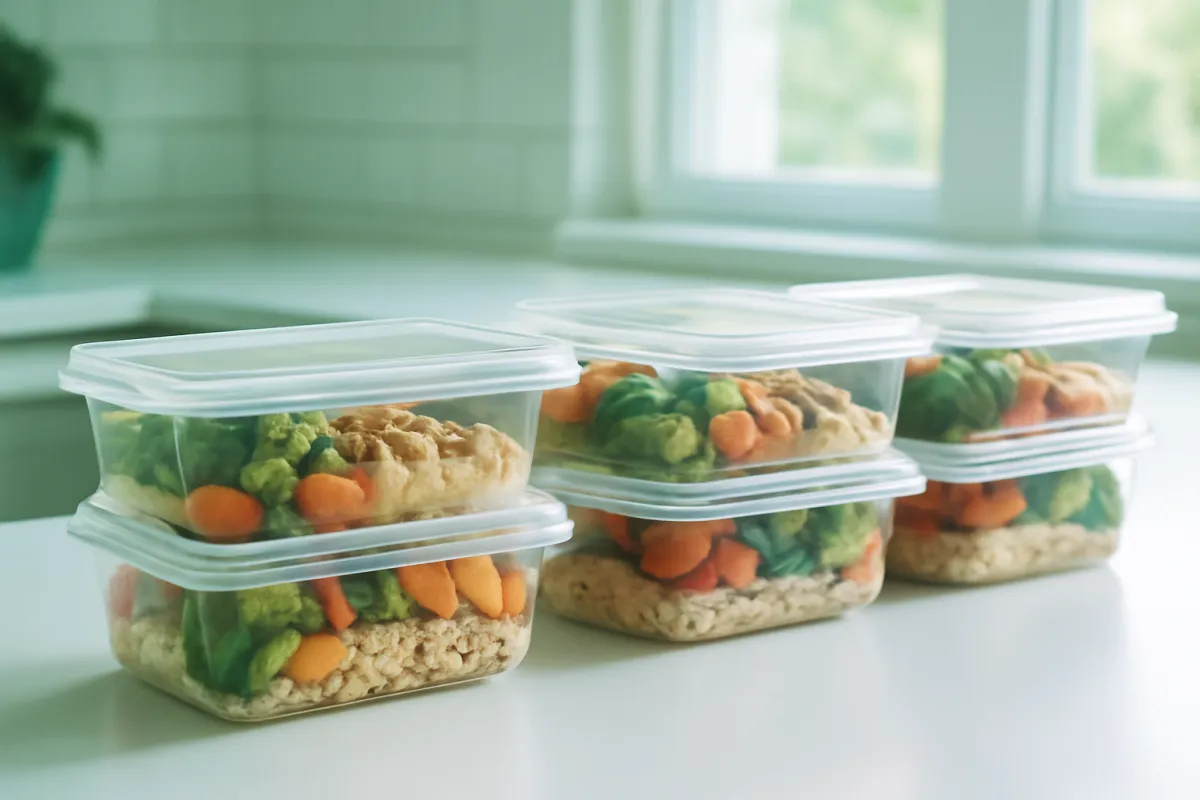
On safety, a few commonly cited general guidelines carry most of the weight. Cool cooked food promptly rather than leaving it out for long, since food left at room temperature for extended periods is a common food-safety risk. Many cooked dishes then keep about three to four days in the refrigerator at a safe fridge temperature, which is why prep is usually planned around a three to four day window, with anything beyond that moved to the freezer, where many prepped meals hold reasonable quality for roughly two to three months. Store food in the airtight containers, keep the fridge cold, and label items with the date so nothing lingers past its window.
Watch out for treating these times as exact promises: the food, its ingredients, how fast it cooled, and your fridge temperature all change real shelf life, so the durable rule is to discard anything that smells, looks, or tastes off. These are general food-safety guidelines rather than personal rules, and for questions specific to your situation, follow current guidance from a food-safety authority.
Step 5: Batch-cook proteins, grains, and vegetables in one session
Now cook, and cook in one focused session with tasks overlapping, because the whole time saving of meal prep comes from doing the cooking once, in parallel, instead of scattered across seven separate evenings. This is the step people picture when they think of meal prep, and the trick to it is running several things at once rather than one after another.
Set the session up around your three main component groups and start the slowest first. Get a protein going in the oven or on the stove, put grains on to simmer, and roast a tray or two of vegetables at the same time, so the oven, stovetop, and counter are all working while you chop and clean up. A common flow is to preheat the oven and start the grains, load a sheet pan of vegetables and a protein into the oven, and use the simmering and roasting time to prep the next batch or wash up. Cooking the components separately, rather than as finished mixed dishes, also keeps them flexible for mix-and-match meals later.
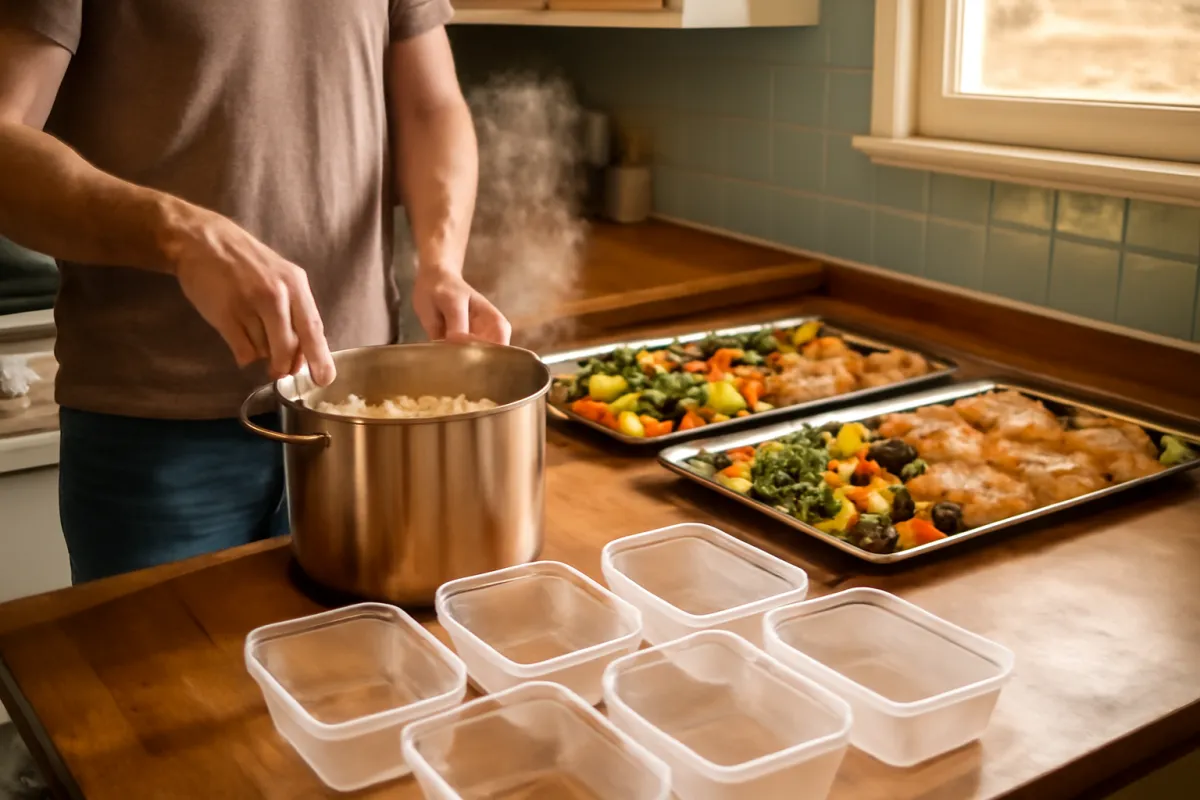
Cook proteins to a safe internal temperature, a commonly cited general benchmark being that many cooked proteins should reach a safe done temperature checked with a thermometer rather than by guessing, and let hot food cool promptly before you seal and refrigerate it. Season components a little more simply than you might for a single meal, since a neutral base takes new sauces and seasonings well across the week and resists the flavor fatigue that kills variety.
Watch out for the first session running long, because it almost always does while the routine is new, then speeds up as you learn to overlap tasks. Do not overcrowd sheet pans, which steams vegetables instead of roasting them, and do not walk away from the whole session at once. This is general cooking and food-safety guidance, not a precise protocol, so follow current safety recommendations for the specific foods you cook.
Step 6: Portion and store for grab-and-go
With everything cooked, portion the components into containers so each meal is a complete, ready-to-grab plate, because a fridge of loose cooked food still asks your busy self to assemble a meal, and the point of prep is to remove exactly that ask. Portioning is the step that converts a pile of cooked food into the effortless grab-and-go meals that make the whole habit pay off.
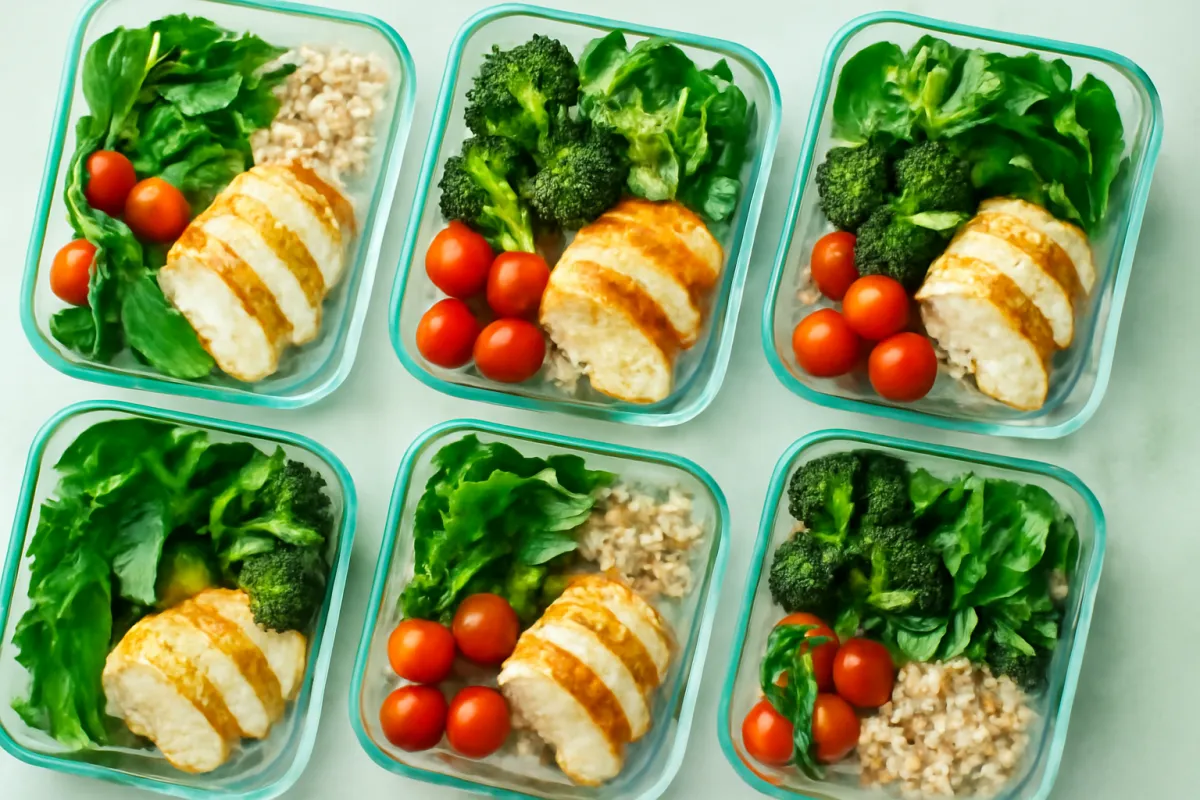
Build each container on the balanced-plate shape, filling about half with vegetables, about a quarter with protein, and about a quarter with a grain, then folding in a little healthy fat. Portion sizes scale to your own needs and goals, exactly as they do on a fresh plate, and if you want to size them by the numbers rather than by eye, our macros walkthrough turns a calorie target into gram-level protein, fat, and carbohydrate portions, our review of how many carbs per day sizes the grain quarter’s daily budget specifically, and the companion below turns your meals and days into a total count to prep. A palm-sized protein, a cupped handful of grains, and a container half-filled with vegetables is a rough visual guide many people find workable.
Store the portioned containers smartly: keep the few days you will eat soonest in the fridge, move the rest to the freezer before quality slips, and label everything with what it is and the date so the three to four day fridge window and the longer freezer window are easy to track at a glance. Keeping fragile components, dressings, crunchy toppings, and fresh greens, in a separate small container or added at serving keeps them from going soggy in storage.
Watch out for portioning by the size of the container rather than by real appetite and need, which quietly turns balanced meals into oversized ones, and for sealing food while it is still warm, which traps steam and shortens its life. Scale to genuine need, cool before sealing, and remember these portions are commonly cited illustrative guidelines rather than personal targets. Anyone sizing meals around a health condition should set portions with a professional.
Step 7: Reheat safely and keep variety so you don’t burn out
The last step spans the whole week the food is eaten: reheat each meal safely, and keep enough variety that you actually look forward to it, because the two ways a prep habit dies are a food-safety scare and plain boredom. Getting this step right is what turns one good session into a routine you keep.
Reheat prepped meals until they are steaming hot all the way through rather than just warm on the edges, since a commonly cited general food-safety guideline is to reheat leftovers thoroughly to a safe hot temperature before eating, stirring partway through so the middle heats too. Take frozen meals to the fridge to thaw ahead when you can, and eat fridge-stored meals within their commonly cited three to four day window. If a meal has been forgotten past its window, or smells, looks, or tastes off, the safe move is to discard it rather than risk it.
Variety is the other half, and it is worth treating as part of the plan rather than an afterthought. Prep two or three meals instead of one, cook versatile components you can dress differently, change the sauce or seasoning or topping to make the same base feel new, and rotate frozen batches across weeks so nothing repeats too often. A neutral grain and protein plus three sauces is three different meals from almost the same cooking. Building variety in from the start is far easier than rescuing a habit after you have burned out on an identical container.
Watch out for the two classic failures this step exists to prevent: eating something past its safe window because you were not tracking dates, and quitting because every day tasted the same. Label and rotate to solve the first, and plan variety to solve the second. This is general food-safety and habit guidance, not a precise protocol, so follow current safety recommendations for reheating and storage, and adjust the variety to your own tastes.
A worked example: an illustrative week from plan to plate
Pulling the seven steps together across one illustrative week shows how quickly the method assembles real food. Meet a general example: someone prepping weekday lunches for themselves, five days, one meal a day, cooking for one, who wants balanced meals and less midday scramble. Nothing here is a recommendation for any real person, it is one week run through the steps so the flow is concrete.
Step 1, goal and style: the aim is time-saving balanced lunches, so they choose a blend of batch cooking and full-meal portioning. Step 2, menu: they plan two lunch templates on the balanced-plate shape, a chicken-and-quinoa bowl with roasted vegetables and a lentil-and-brown-rice bowl with a different vegetable mix, so five lunches split across two flavors rather than one repeated meal. Step 3, shop: the list groups by section, leans on staples like lentils, brown rice, quinoa, and frozen vegetables, and is scaled to five servings, which the companion estimates from one meal a day across five days. Step 4, containers and safety: five airtight single-serving containers, with the plan to keep the first few days in the fridge inside the three to four day window and freeze the last two.
Step 5, batch-cook: in one session they roast chicken and two trays of vegetables in the oven while quinoa and rice simmer and lentils cook, overlapping the tasks so the active time stays modest. Step 6, portion: each container is filled to the plate shape, about half vegetables, a quarter protein, a quarter grain, with a small separate cup of dressing to add later so nothing goes soggy, and each is labeled with the date. Step 7, reheat and vary: the two frozen lunches move to the fridge the night before, each meal is reheated until steaming, and alternating the two templates keeps the week from tasting repetitive.
The finished week reads cleanly: five balanced, portioned lunches ready to grab, cooked in one session, split across two flavors so nothing gets old, with two frozen for later in the window. Change one input, say they want dinners too or are cooking for a partner, and the same steps scale up: the servings double, the container count rises, and the companion’s total climbs to match. That is the point of building it this way, the process stays constant and only the scale moves.
Common meal-prep mistakes
Most meal-prep failures are not exotic, they are a handful of predictable slips, and each is easy to sidestep once named.
- Over-prepping and getting bored. Cooking seven days of one identical meal is the most common way prep dies, because even a good meal gets old fast. Prep fewer days, or more variety, so you still want to eat what you made.
- Unsafe storage. Leaving food out to cool too long, sealing it while hot, losing track of dates, or pushing past the commonly cited fridge window turns a healthy habit into a risk. Cool promptly, seal cold, label everything, and freeze what you cannot eat in time.
- Prepping with no plan. Cooking a pile of random food with no menu leads to components that do not combine into meals and to over-buying. Plan the meals first, then shop and cook to that plan.
- Soggy, sad food. Dressing salads early, storing crunchy items mixed in, and prepping foods that do not hold up leaves meals unappetizing by day three. Keep fragile parts separate and add them at serving.
- Forgetting snacks. Prepping only main meals leaves the hungry gaps between them to chance, which is where convenience food sneaks back in. Prep a few simple snacks, often protein and produce, alongside the meals.
- Buying too much perishable food. Over-buying produce that spoils erases the budget and health wins. Buy to your real serving count and lean on frozen and canned options that keep.
Clear these six and the habit does its job calmly, handing you balanced meals with almost no weekday effort.
Troubleshooting and edge cases
A few common situations change the practical details, though never the underlying seven-step logic. What if you have a tiny kitchen or little storage? Lean toward ingredient prep and smaller batches rather than a full week of portioned containers, since chopped vegetables, a cooked grain, and a protein take less space than seven full meals, and prep fewer days at a time so your fridge and container count are not the limit. A single sheet pan and one pot can still cover several meals.
What if you have no time to prep? Shrink the scope rather than skipping it: prep one meal slot for three days instead of every meal for seven, choose fast components like frozen vegetables and quick-cooking grains, and lean on ingredient prep so the up-front session is short. Even prepping a couple of lunches removes several tired decisions from the week, and a small sustainable prep beats an ambitious one you never do.
What if you cook for picky eaters or a mixed household? Prep versatile components rather than fixed meals, so everyone assembles their own plate from the same cooked parts with different sauces, portions, or add-ins. Cooking plain proteins, grains, and vegetables and letting each person finish their own bowl handles a lot of variation without cooking separate meals, and it keeps the balanced shape intact for anyone who wants it.
What if you keep throwing food away? Food waste usually means you are prepping more than you eat before the window closes, so cut the batch size, freeze more aggressively, and track dates with labels. Prep only as many meals as you will realistically finish, and treat the freezer as the pressure valve for anything you will not reach in three to four days.
What if you have a medical condition or special diet? This is the important one. Diabetes, kidney disease, heart conditions, food allergies, pregnancy, digestive disorders, and other situations can call for a specific eating plan that overrides this general shape, sometimes changing which foods and portions belong in each container. If any of these apply, treat this walkthrough as background only and follow the plan set by your doctor or registered dietitian.
Your meal-prep checklist
Keep this short routine on hand to prep a stretch of meals any week, whether it is a few lunches or a fuller spread.
- Set your goal and pick a style, batch, full-meal, or ingredient prep, that matches your time, kitchen, and what you actually struggle to eat.
- Plan a short balanced menu, building each meal on the plate shape and designing versatile components for mix-and-match variety.
- Build a grocery list from the menu, grouped by store section and scaled to your real serving count, leaning on staples and frozen options.
- Sort your containers and food safety, choosing airtight stackable sizes and planning around the commonly cited three to four day fridge window with a freezer backup.
- Batch-cook in one overlapping session, starting the slowest component first and cooking proteins to a safe temperature.
- Portion into grab-and-go containers, built to the plate shape, sized to your needs, sealed once cooled, and labeled with the date.
- Reheat until steaming and rotate for variety, eating fridge meals within their window, thawing frozen ones ahead, and changing sauces so nothing gets old.
Run your own meals per day, days, and servings through the companion below to see how many meals you would be prepping and a rough grocery scale.
The bottom line
Meal prepping for the week is less about cooking skill than about moving decisions to a calmer time, so the tired, hungry version of you finds a balanced meal already waiting instead of an empty plan. Set a goal and a style, plan a short balanced menu, shop from a list scaled to your real needs, sort your containers and the commonly cited food-safety windows, batch-cook the components in one overlapping session, portion them into grab-and-go plates, then reheat safely and rotate enough variety that you never burn out. Start small, often just a few lunches, and scale up only once the routine feels easy, because a sustainable prep you keep beats an ambitious one you abandon. Every time, portion, and food-safety figure here is a commonly cited, illustrative general guideline rather than a personal prescription, so pair it with our balanced plate, macros, calorie, and protein evidence reviews, and confirm anything specific to your health, goals, or conditions with a qualified professional.
This evidence review is published for general education and describes commonly cited meal-prep and food-safety practices as an illustrative framework, not medical, nutritional, or dietary advice, and reading it creates no clinician-patient relationship. Every time estimate, portion, and storage window above is a general guideline or worked example rather than a measurement or a personal recommendation, and real foods, kitchens, appetites, and needs vary widely. Food-safety practices matter for health, and official guidance on safe cooking, cooling, storage times, and reheating can change, so confirm the current recommendations with a recognized food-safety authority rather than relying on any figure here as exact. Nutritional needs also differ from person to person, and some situations, including diabetes, kidney disease, heart conditions, digestive disorders, food allergies, pregnancy, and any history of disordered eating, call for an individually managed eating plan that overrides any general shape here. For meals and food-safety practices suited to your body, goals, medications, or any medical condition, consult a qualified health professional such as a doctor or registered dietitian.
Frequently asked questions
How do I start meal prepping for the week?
The simplest starting point is to pick one goal, choose a meal-prep style, and prep just a few meals rather than a whole week at once. Decide whether you are prepping to save time, eat more balanced meals, save money, or all three, then choose one style: batch cooking large amounts of a few dishes, portioning full meals into single containers, or prepping ingredients to assemble later. From there you plan a short balanced menu, build a grocery list, cook in one session, and portion the results into containers. Many people find starting with two or three lunches is far more sustainable than an ambitious full week that ends in burnout. This is general educational information, and anyone with a medical condition or specific dietary needs should tailor a plan with a registered dietitian.
How long does meal-prepped food last in the fridge?
Commonly cited food-safety guidance suggests that many cooked dishes keep about three to four days in the refrigerator when they are cooled promptly and stored in airtight containers at a safe fridge temperature. Anything you want to keep longer than that is usually better moved to the freezer, where many prepped meals hold reasonable quality for roughly two to three months. These are general guidelines rather than exact rules, because the food, the ingredients, your fridge temperature, and how quickly the food was cooled all affect real shelf life. When in doubt, follow the classic rule of throwing out anything that smells, looks, or tastes off. For food-safety questions specific to your situation, follow current guidance from a food-safety authority or your health professional.
Is meal prep actually cheaper than buying food each day?
For many households it can be, because buying ingredients in larger quantities, planning meals around what is on sale, and cooking at home usually costs less per serving than daily takeout or convenience food, and a plan also cuts the food waste that quietly drains a grocery budget. The savings are not automatic, though: over-buying perishable ingredients that spoil, or prepping elaborate meals with expensive components, can erase the advantage. The biggest budget wins tend to come from inexpensive staples such as beans, lentils, eggs, whole grains, frozen vegetables, and cheaper cuts of protein. Any dollar figures here are illustrative and vary widely by region and season. Treat cost savings as a likely benefit for most people rather than a guarantee.
How many meals should I prep at once?
A good general answer is to prep as many meals as you will realistically eat before they need to be thrown out, which for fridge storage usually means planning around a three to four day window and freezing anything beyond it. Many beginners do best prepping one meal slot, often lunch, for three to five days, then scaling up only once the routine feels easy. Prepping every meal for a full seven days in one session is possible but is where most people over-commit, get bored of eating the same thing, or run into storage limits. The right number depends on your appetite, your schedule, your fridge and freezer space, and how much variety you need to stay interested. Start small and scale up, rather than the reverse.
Do I have to eat the same meal every day when I meal prep?
No, and building in variety is one of the main ways to keep meal prep sustainable. A few common tactics help: prep two or three different meals instead of one, cook versatile components such as plain grains, roasted vegetables, and a protein that can be dressed different ways across the week, and change the sauce, seasoning, or topping to make the same base feel new. Freezing half of a big batch also lets you rotate meals across weeks so nothing repeats too often. Eating an identical meal every single day is a common reason people abandon meal prep, so treating variety as part of the plan rather than an afterthought is worth the small extra effort. This is general guidance you can adapt to your own tastes.
What foods do not meal prep well?
Some foods lose texture or quality when cooked ahead and stored, so they are worth prepping only partway or keeping separate until serving. Foods that tend to go soggy, such as crispy items, fried foods, and delicate salad greens dressed too early, often disappoint after a few days, and some items like certain fried or breaded foods rarely reheat to their original texture. A common workaround is to prep the sturdy components ahead, roasted vegetables, grains, cooked proteins, sauces, and beans, and add the fragile parts, dressings, fresh herbs, crunchy toppings, and greens, only when you eat. Delicate items also keep better stored separately rather than mixed in. These are general texture and quality notes rather than food-safety rules, and the underlying safety guidance still applies to everything you store.
How much time does meal prepping for the week take?
It varies widely with the style you choose and how many meals you make, but many people find a focused batch-cooking session for several days of one meal takes somewhere in the range of one to three hours, including planning, cooking, and cleanup. Ingredient prep, where you wash, chop, and portion components rather than fully cooking meals, can take less time up front but adds a little assembly time later. The first few sessions almost always run longer while you build a routine, then speed up as the steps become familiar and you learn to overlap tasks, such as roasting vegetables while grains simmer and a protein cooks. These are illustrative ranges, not fixed figures, and your real time depends on your menu, kitchen, and experience.
Is meal prep healthy?
Meal prep is a method rather than a diet, so whether it is healthy depends entirely on what you prep, but it can make balanced eating easier by putting a planned, portioned meal within easy reach when you are hungry and short on time. Having a balanced meal ready tends to reduce reliance on last-minute convenience food, and planning ahead makes it simpler to include vegetables, quality protein, whole grains, and sensible portions. The flip side is that prepping large amounts of calorie-dense or heavily processed food simply makes it easier to eat more of that, so the balance of what you cook matters more than the act of prepping. This is general educational information, not a personalized nutrition plan, and anyone with specific health goals or conditions should work with a registered dietitian.

Hamza Hai is the editor of NourishMark. She holds an MBA and reviews the site's articles against our editorial standards, checking that every figure is labelled for what it is, that nothing is presented as verified fact without a source the reader can check, and that the writing stays useful to a non-specialist.

Dr. Shayaan Khan is the medical reviewer for NourishMark. He holds an MBBS from MGM Medical College, Navi Mumbai, and is the author of published research including a narrative review of postpartum anxiety and depression in Mental Health Science. He has taught physiology at university level. He reviews the site's health content for medical accuracy: that physiology and mechanisms are described correctly, that no claim is stated more strongly than the evidence behind it, and that anything specific to an individual reader is sent to that reader's own clinician.
Not medical advice. Dr. Khan reviews NourishMark's health content for medical accuracy. He is not a registered dietitian, he does not hold a United States practising licence, and he is not your doctor. His review does not make anything here medical advice. Always talk to a qualified health professional about your own situation, and never delay or stop care because of something you read here.